
Echoes of the Past is the third mission of the Crimson Fleet faction in Starfield and the follow-up to Rook Meets King. Our character, along with Delgado and Mathis, must enter The Lock on Suvorov (for the first time since Jasper Kryx escaped it) and try to find out information about Kryx’s Legacy. Things won’t go as planned, though… This guide will you walk through every step of the mission and all the discoveries hidden inside The Lock.
- Crimson Fleet Mission 03
- Planets: Suvorov (Kryx System)
- Rewards: 10,500 Credits, 350 EXP, Keelhauler
Proceed to the Surface of Suvorov

Your first objective is to land on Suvorov to join Delgado and Mathis for the new mission. Open your missions log and “Set Course” to the objective. Then land on Suvorov.
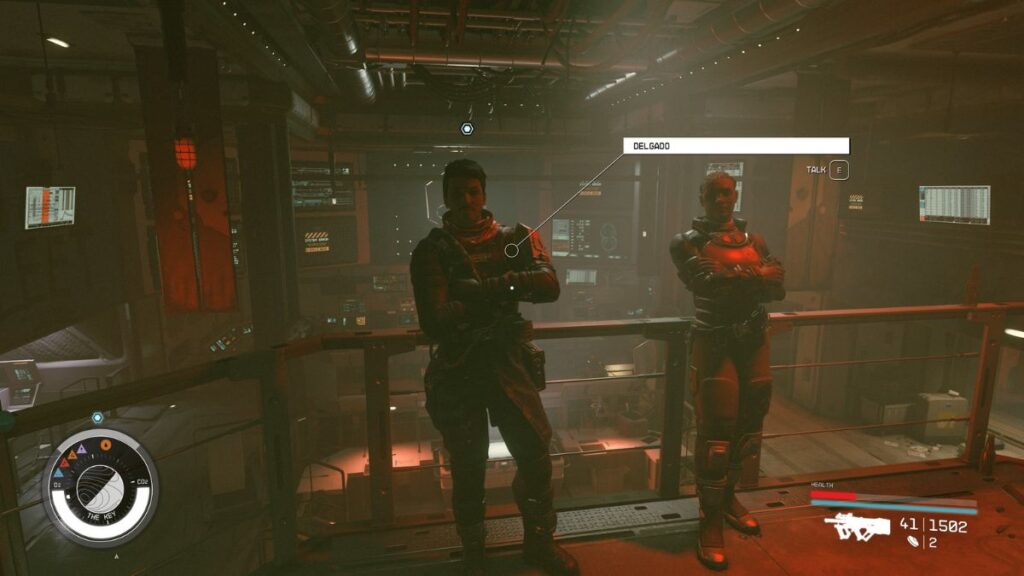
Speak to Delgado

Delgado will explain that your only goal is to dig up any info on Kryx’s Legacy, not to scrap for loot around The Lock. He expects you and Mathis to follow one simple rule: Do whatever he says, no questions asked. He also informs you that your follower companion can’t join you inside the prison.
Meet Delgado at the Entrance of The Lock

Your way to the prison won’t be a field trip, as multiple Immature Gryllobas will be blocking your way. You can loot their corpses for Hypercatalyst (Caparace), Adhesive (Vital Fluids), and Nutrient (Vital Fluids). You will face many of them, and these things move fast, so I recommend using your Cutter or a melee weapon to exterminate themno need to waste your ammo here. Once you clear the prison’s exterior, find Delgado at the outer door to The Lock.
Speak to Delgado at the Outer Door to The Lock

You are finally at the place where Jasper Kryx laid the groundwork for finding the Legacy and, eventually, the Crimson Fleet. Jasper Kryx spent five years inside The Lock, but the legend says he was planning his escape from day one.
Wait for Delgado to Unseal The Lock

Mathis will complain about the cold and urge Delgado to open the outer gate. Finally, after some back and forth, Delgado will use an ID Card Naeva spent a fortune on and open it.
Continue Exploring The Lock
You are finally inside the legendary prison where everything started for The Crimson Fleet. As soon as you enter, you will find some manufactured components worth looting for your Outpost building escapades. You will start descending the stairs, and Delgado will keep talking about Kryx’s Legacy.

You can loot a Storage Box, a Digipick, and some more manufactured components at the base of the stairs. The Storage Box is locked with a Novice Security Level lock. I found two Antimicrobials inside.

Once you reach the next entrance, the objective will change to “Secure the Entrance,” as you will be attacked by both Immature Gryllobas and Young Gryllobas.
Secure the Entrance

Once you deal with every Grylloba, you speak to Delgado, but first, loot the Depository room and the Processing room with the Prisoner and UC Guard bodies. The Weapon Case (Advanced Security Level) inside the Depository was empty for me. The processing room has some Credsticks and a Helmet Display to unlock.
You should also take the entrance to the Workroom, Storage, C-Block, and B-Block. While most paths are sealed, you will find more loot and a Storage Create (Novice Security Level) to open. Once you are done, speak to Delgado.
Speak to Delgado

Delgado will tell you that The Lock must be a Grylloba nest, and Mathis will start complaining that the rest of the Grylloba heard our gunshots. Our task will be to enter the Control Room and try to open the locked gates.
Proceed to the Control Room

As you try to enter the Control Room area, the roof will fall, and you and Mathis will be cut off from the rest of the crew. You’ve got some excellent company…
Speak to Mathis
Mathis will recommend ignoring Delgado’s orders and instead try to take him out and keep the potential loot to yourselves. You can read about the consequences of siding with Mathis or Delgado (spoiler alert).

I ignored Mathis’s ideas, as my goal in this playthrough is the Burden of Proof anyway and siding with SysDef, not becoming the King of Pirates (after all, that position is intended for someone else in the universe).
Proceed to the Control Room (Continued)
Mathis will become your follower from now on. Open the Loose Panel to access the next room. Loot the Partners in Time Data Slate from the desk before you. You will hear inmates Rikkard and Zouch discussing Jasper Kryx’s escape plan.

The room has more manufactured components and loot from the two destroyed robots. Once you reach the Control Central room, loot the UC guard’s body and speak to Delgado through the Intercom device.

Use the Intercom to Speak to Delgado

Delgado is surprised that both of your rooks are still alive after that icefall and roof collapse. Delgado will order you to keep searching for a way to open the gates while searching for hints on Kryx’s Legacy.
Open the Doors for Delgado

Use the Transfer Area Control Workstation to override the lockdown and get access to the D-Block. Loot the other UC Guard body and the Pharmaceutical Kit before you go.
Proceed to D-Block

Head downstairs, and you will find another control room. Use the Prisoner Intake Workstation computer to Activate D-Block Auxiliary Power. Loot the UC Guard and the two Ammo Cases before you leave the room. And don’t forget the Surface Tension Data Slate.

Enter D-Block’s Guard Tower

Note: Save your Digipicks and don’t unlock any cells that you find from now on, unless you are levelling up your Security Skill. You will be able to open every cell in the D-Block towards the end of the mission.
Once in the next room, Mathis will recommend entering the Guard Tower of the D-Block. This room contains a Weapon Case and some Ammo Cases.

Now take the door to the D-Block. You will face some Young Gryllobas and Immature Gryllobas Hunters now. You can also take the path to the right, a dead end, to loot a Storage Crate and loot the Prisoner body where you faced the Gryllobas.

Keep following the arrows towards the objective marker and loot the four cells you pass by. One of them has a Novice Security Level lock. You will face more Gryllobas now, and you can loot three more cells. You will find books inside them most of the time. You can loot another locked Weapon Case (Advanced Security Level) once you reach the tower’s base.
Speak to Mathis

Mathis will talk about his plan once again. In my case, he asked me if I changed my mind since I declined his offer. Once you speak with Mathis, loot everything inside the guard tower.
Locate Jasper Kryx’s Cell


Use the workstation and open the D-Block Switch Control document to unlock all three Cell Block Switches. This will unlock the optional objective below to locate the cache in Cell D-02-106. Check the Prisoner Records and open the D-Bock Section 03 Prisoner List to find Jasper Kryx’s cell (D-03-118).
(Optional) Locate the Cache in Cell D-02-106
While locating the Cache in Cell D-02-106 is easy, opening the Cell itself needs some work. Follow the objective marker to Cell D-02-106. Once you reach it, back up the stairs and jump to the area on your left. Take the next stairs up until you see a door to the Kitchen. Keep following the stairs to the next floor to reach the Security room.

Loot everything inside the Security room (don’t miss out on the Weapon Rack). Activate the D-Block Section 02 Cell Release Switch to open every cell in Section 02, including Cell D-02-106.

Now, head back to Cell D-02-106 to take the loot. I got a Furious Assassin’s Beowulf Rare Rifle.


Search Kryx’s Cell for Information
Before we head to Kryx’s cell, what about the Cells in Section D01? Do you remember the cells at the start of the D-Block part of the guide? Well, those are also open now, so head back to loot them too. Finally, you can jump down to loot a Storage Crate (Advanced Lock) and a Weapon Case and head to the opposite side to loot some stuff inside the Ventilation room and find a door to the Workroom, which requires Master Security Rank to unlock (I’m Rank 3, so I couldn’t open it).

Now, head towards the objective marker to find Jasper Kryx’s cell. A few meters away from it, you will find the D-Block Section 03 Cell Release Switch, which unlocks all the cells in the section, including D-03-118 (Kryx’s cell).

Head inside Kryc’s cell, activate the lamp, and “Pry open the base” to reveal the “Best Laid Plans” Data Slate. Take it to complete the objective.


Listen to Kryx’s Log
Kryx’s log will reveal that a GalBank ship named “Legacy” went down in some remote system during the Colony War. Kryx’s next move was to contact Carter (whoever that is) and let him know it’s time to escape The Lock. After you listen to Kryx’s log, you will acquire Carter’s Locker Code, which you can use to access its locker.
Search Carter’s Locker

Head to the Showers of Section D2. The room’s entrance is exactly where you jumped from the Cell D-02-106 corridor. You will find the Carter’s Gig Data Slate inside Carter’s locker, evidence for the Burden of Proof mission.
Access Kryx’s Escape Tunnel

Getting to the Ventilation room is inevitable, after all. Use the Maintainance Access Computer to open the door to the room on the left. Head in there and interact with the Door Panel to reveal the entrance to Kryx’s escape tunnel.
Proceed to the Shuttle Bay

Note: There is a ton of a loot moving forward. Make sure you loot everything inside Warden Gillespie’s. There are a few more Expert and Master Security level locks in here, so the whole place begs to be visited again.
Head to the objective marker, and you first pass through the armory. Loot everything you can there, and then reach the Guards’ Barracks. From there, follow the signs to the Warden’s Office. You can access Warden Gillespie’s Workstation and talk to Delgado through the Intercom device.
Use the Intercom to Speak to Delgado

Speak to Delgado through the Intercom and tell him about your discovery regarding Kryx’s Legacy. You can either tell him that Mathis was helpful or not. Delgado will order you to take the ship inside the Cargo Bay and fly back to The Key. Before you leave this area, loot the Warden’s Log Data Slate (Evidence for Burden of Proof), the Military Crate (contained an epic Barrow Knife for me), the Weapon Case (Advanced Security Level), and the Ammo Case.

Speak to Mathis

In my case, I told Delgado that Mathis was useless during this mission, so Mathis was a bit angry, but I threatened to expose his plan to kill Delgado, and he just asked me to forget about the whole thing. I just told him that he owes me a big favor.
Enter the Shuttle Bay

The place is a Grylloba nest, as Mathis said, and every nest has a Queen. It’s time for a boss to fight against an Adolescent Grylloba Queen (Level 24) and her minions.
Secure the Shuttle Bay

I focused on the little Gryllobas first and let Mathis aggro the Queen until I switched targets to her and mostly damaged her with melee attacks. Eventually, I used a couple of toxic mines, which drained her health like crazy. The loot was Quark-Degenerate Tissues, Adhesive x5, and Spice x8.

Use the Shuttle to Exit The Lock

Before you go, it’s worth doing a final runaround to ensure you don’t miss anything from the boss room, as there is a bit more loot to be had. Once inside the ship, loot the Weapon Cases from the first floor and then take the ladder to the Cockpit. Loot the Cargo Hold and the Captain’s Locker, and you should be ready to go.
Travel to the Key

Once you dock with The Key and board it, head left to the Cargo Bay. Then head to the Reckoner’s Core and take the elevator to the Operations Center. You will meet Delgado and Naeva at the room’s internal balcony.
Speak to Delgado
Talk to Delgado and hand him over Kryx’s Data Slate. Delgado will give you the Keelhauler (Legendary Pistol), and he will decide to cut Mathis off (at least in my case, he did, and I told him I thought it was the right decision). Your next mission will require you to pay the Trident Exotic Lines‘ (you may have visited their staryard) cruise ships to obtain the credentials of a GalBank executive and access New Atlantis’ Galbank to recover any information about the “Legacy.” But before that, you must speak to Mathis at the Last Nova.

Speak to Mathis
Mathis is unhappy about Delgado’s decision to kick him out of The Crimson Fleet (thanks to us) and says he will come after us. Whatever…
Speak to Naeva at The Last Nova

After handling your business with Mathis, you will chat with Naeva at The Last Nova. Our latest discovery on Suvorov has caused an issue for Naeva. She was preparing a gig with Rokov, the Captain of the Siren of the Stars and a former member of the Crimson Fleet. Naeva intended to steal the trophy (which seems to be a ship) from a charity event aboard the ship, and she now wants us to do that for her, even though Delgado ordered her to take a step back. The next mission will be two birds with one stone for us then.
Report Mission Progress on the UC Vigilance
With such important revelations, we must report to our original bosses about what happened and receive our next orders. Head to UC Vigilance to talk to Commander Ikande. You will meet both Commander Ikande and Lieutenant Toft at the Operations Center.
Speak to Commander Ikande

Ikande will urge you to continue investigating the “Legacy” and follow Delgado’s orders to steal the GalBank credentials and find out more about the “Legacy.” This will conclude “Echoes of the Past,” rewarding you with 350 EXP and 10,500 Credits and unlocking “Breaking the Bank“.

- How to Beat Juggernaut in Armored Core 6 Cheese Build - May 8, 2024
- How to Beat EC-0840 Smart Cleaner (Best Cheese Builds) - May 8, 2024
- How to Use Photo Mode in Armored Core 6 - May 8, 2024