In this segment of the Starfield walkthroughs, we present an exhaustive guide to tackling “The Empty Nest,” the fourth critical mission we advise you to undertake within the main storyline. This mission becomes accessible post-completion of “The Old Neighbourhood,” alongside “Back to Vectera” and “Into the Unknown.” Throughout this guide, we’ll pinpoint locations for essential items, hidden collectibles, and loot opportunities to enhance your quest while assisting Sam Coe in retrieving vital maps.
Talk to Sam at the Lodge Image Credit: Bethesda via Meta Game Guides
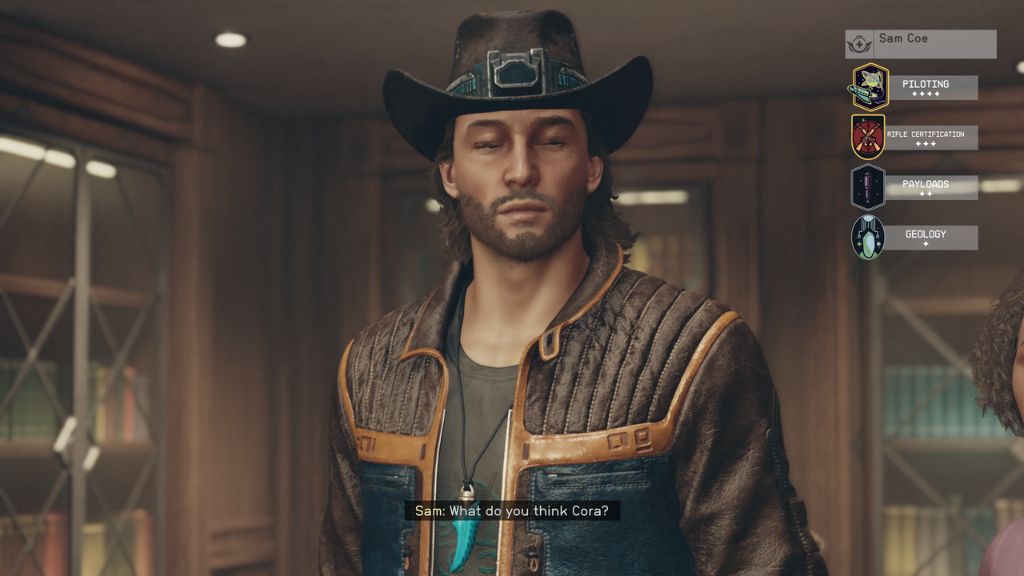
Head inside The Lodge. Enter the Library and open the door to the left to find Sam Coe talking to his daughter, Cora Coe. Sam is heading to Akila City, the capital of the Freestar Collective, as he has a lead on another Artifact. Cora and Sam will come to your ship to take them to Akila City.
Travel to Akila City
Grav Jump to Akila City in the Cheyenne System Image Credit: Bethesda via Meta Game Guides
Akila City is located on planet Akila in the Cheyenne System. In my case, I could barely make the Grav. Jump to Cheyenne from Alpha Centauri as the fuel consumption was 48.45/50 with the default Frontier ship. However, you will probably need to head to the Olympus System first (I had already done that) to connect Alpha Centauri to Cheyenne. This is the first limitation of the Grav. Jump you will encounter.
Grav Jump Limitation: When you set course to a new Star System you must have explored all the interconnecting star systems to perform the Jump. In this case, you should head to Olympus or Aranae to make a connection to Cheyenne. Once you do, you will be able to directly Grav. Jump from Alpha Centauri to Cheyenne, as long as your fuel consumption permits it.
Once you reach Akila you will be scanned for Contraband before you can land on Akila City. Once the scan is complete, open your map and set Akila City as the landing target (perform a planet scan too if you haven’t already). Land at Akila city to proceed with the next objective.
Land at Akila City Image Credit: Bethesda via Meta Game Guides
Talk to Sam
Talk to Sam once you land at Akila City Image Credit: Bethesda via Meta Game Guides
Talk to Sam once you land at Akila City. Once you proceed, Sam will be locked in as your companion until you complete The Empty Nest. Sam Coe is a descendant of Somolon Coe, and he is searching for Solomon’s Maps, as they reveal a tiny little patch of nothing in his mapping sensors. This is probably an anomaly produced by an Artifact. Solomon named the location the “Empty Nest,” thus the mission’s name.
Solomon’s maps are inside a vault in GalBank, Starfield’s intergalactic bank. It’s time to follow Sam to Akila City‘s GalBank branch.
Go to the Galbank Vault
The security guard will stop you at the entrance Image Credit: Bethesda via Meta Game Guides
Open your Scanner and track the Objective Marker. Head into Akila City from the main entrance. An Akila City Security Guard will stop you and inform you of trouble at GalBank. There was an attempted bank robbery at the bank, so it’s been locked down. However, since you have a Freestar Ranger with you, you can proceed to help with the incident.
Offer your help, and you must complete the “Job Gone Wrong” side mission. Alternatively, you can avoid the security guard and skip this part.
Complete “Job Gone Wrong” Side Mission
Find Marshal Daniel Blake to start the “Job Gone Wrong” side mission Image Credit: Bethesda via Meta Game Guides
Note: Job Gone Wrong can be complete before The Empty Nest main mission.
Completing “Job Gone Wrong” is now mandatory to reach the GalBank Vault. Head to Galbank (it is on your right side, just past Akila City‘s entrance). Find Marshal Daniel Blake and talk to him. Offer your help to convince the bank robbers to surrender and free the hostages.
Image Credit: Bethesda via Meta Game Guides
Sam‘s presence as a former Freestar Ranger will make Daniel agree to your offer, leading you to your next objective.
Persuade the Bank Robbers to Surrender
At this point, you have two options:
Convince the Shaw Gang robbers to surrender and resolve the matter peacefully.
Sneak into Galbank and take the robbers out.
Head to Galbank’s entrance and use the intercom to talk to the Shaw Gang robbers’ leader. I recommend raising your Persuasion skill to at least Rank 3 for this task, as convincing the leader may be tough.
How Persuasion Works
Having received your briefing from Marshal Blake, it’s a good idea to familiarize yourself with the fundamentals of the Persuasion mechanic. Select any dialogue option marked with Persuasion to access the Persuasion Menu. Your objective here is to accumulate a predetermined number of Persuasion Points by choosing “successful” dialogue options within a limited number of turns.
Each turn provides you with a range of dialogue options classified by difficultyfrom Easy (Green) to Medium (Orange), and Hard (Red). Opting for Easy dialogue choices offers higher success rates but garners fewer Persuasion Points. Conversely, Hard dialogue options are risky but have the potential for racking up many Persuasion Points.
Choosing an unsuccessful dialogue option will cost you a turn without earning any points. However, if you find yourself on your last turn and make a successful dialogue choice, you’ll be awarded an extra turn, extending your Persuasion session.
Persuading the Shaw Gang Leader
Armed with your newfound negotiation knowledge, contact the Shaw Gang leader via the intercom just to the left of GalBank’s entrance. Though the Persuasion mechanic relies on a blend of luck and your Persuasion Skill Level, there are crucial specifics you should be aware of before attempting to talk the bank robbers into standing down.
Your conversation with the Shaw Gang leader is divided into two segments, giving you two distinct chances to influence the outlaw’s actions. It’s essential to note, however, that while the first segment gives you a strategic edge in negotiations, only the second segment can lead to the release of the hostages.
Navigate through the following sections for more details:
Earning the Shaw Gang Leader’s Trust
Convincing the Shaw Gang Leader to Free the Hostages
Earning the Shaw Gang Leader’s Trust
TLDR: After raising my Persuasion to Rank 3, I picked all the Easy options in the Persuasion dialogue for both parts. They all succeeded, thus reducing the Persuasion points required to 6 and even providing an extra turn.
As you talk with the criminal mastermind, he’ll immediately question your allegiances: are you an impartial mediator or just another pawn of Marshal Blake?
Although the hostages can only be freed in the second segment of the dialogue, gaining the gang leader’s trust initially can significantly enhance your subsequent attempt to persuade him to release the hostages. During this phase, you’ll have three turns to accumulate eight Persuasion Points. Below is a table that outlines the possible outcomes:
Persuasion Attempt #1
Result
Effect
Critical Success
+10 XP
Reduces required Persuasion Points for freeing hostages from 8 to 6.
Persuasion Success
+10 XP
Reduces required Persuasion Points for freeing hostages from 8 to 6.
Persuasion Failure
—
You’ll need to earn 8 Persuasion Points to free the hostages.
Even if the first attempt doesn’t go as planned, you can still convince the Shaw Gang leader to free the hostages during your next opportunity. However, triggering that chance requires specific actions.
Convincing the Shaw Gang Leader to Free the Hostages
Regardless of whether you’ve won the leader’s trust, he will proceed to list his demands. This marks the moment to initiate the second persuasion attempt, which could free the hostages.
Important Note: To instigate this next persuasion segment, you’ll need to select the dialogue option “Persuade It’s not too late to end this peacefully” after the leader’s demand listing. Opting for any other dialogue choice will eliminate a peaceful resolution to the mission.
You’ll require six Persuasion Points within three turns if you successfully gained the leader’s trust. However, the requirement will remain at eight points if your initial persuasion attempt is unsuccessful.
Since persuasion is primarily a game of chance, feel free to choose the dialogue options you believe will most likely sway the gang leader. If you manage to persuade him to release the hostages and surrender, your role in the “Job Gone Wrong” Mission is essentially complete.
However, if you’re unsuccessful, you must return to Marshal Blake to explore other strategies.
Talk to Daniel Blake
Report back to Marshal Blake, and after a short discussion, you’ll receive your rewards and a new optional missionDeputized Side Mission!
Your reward will be 3000 Credits (+1000 Credits, probably because you convinced the robbers to surrender) and 700 EXP.
We won’t explore the alternative route in this guide, as it focuses on “The Empty Nest“
Let’s get back to the Empty Nest’s objective now that you can the GalBank Vault.
Go to GalBank Vault (Continued)
Image Credit: Bethesda via Meta Game Guides
Enter Akila City’s Galbank and take the stairs down to the vault.
Search for the Maps
Image Credit: Bethesda via Meta Game Guides
You will have to open two Secure Storage Lockers to find a Note for Sam.
Talk to Sam
Image Credit: Bethesda via Meta Game Guides
Talk to Sam after you pick up the note from the locker. Sam will tell you that Jacob picked up the maps. You will have to persuade Sam to reveal that Jacob is his father. You must now head to the Coe Estate to talk to Jacob.
Thank Sam for opening up for some likeness points.
Talk to Jacob
Image Credit: Bethesda via Meta Game Guides
Reach the Coe Estate by following your Objective Marker. Sam and Jacob will start talking. Jacob will head to the maps to guard them. Have Sam talk intervene in your conversation with Jacob, as he will like that.
Talk to Sam
Image Credit: Bethesda via Meta Game Guides
Talk to Sam to discuss your next options.
Get the Maps
Note: This is where ranking up Persuasion for Job Gone Wrong will help even more.
Talk to Sam will reveal the following three options:
(Optional) Ask Cora For Help
Avoid this option, as Sam won’t like it.
(Optional) Talk to Jacob and Have Sam Distract Him
This option will have Sam distract Jacob while you sneak and pick the lock to the room he is guarding.
(Optional) Talk to Jacob and Persuade Him
Picking up the Easy dialogue options should do the trick Image Credit: Bethesda via Meta Game Guides
I recommend picking this option as it’s the easiest. Save your game before the conversation to retry if you want to, otherwise you will have to resort to option #2. I picked up the Easy dialogue options to convince Jacob as he needs only 4 points to be convinced.
Note: If you picked up the Freestar Trait during character creation a fourth option may appear in the first dialogue that probably has 100% success chance and grants two Persuasion points.
Image Credit: Bethesda via Meta Game Guides
Once done, enter the room and pick up the maps.
Image Credit: Bethesda via Meta Game Guides
Talk to Sam
Talk to Sam to reveal the Empty Nest location Image Credit: Bethesda via Meta Game Guides
As it turns out, the Empty Nest is a cave within Shaw Gang‘s territory. Your next objective will take you there.
Travel to the Empty Nest
Image Credit: Bethesda via Meta Game Guides
Open your Starmap or Missions menu to find the Empty Nest‘s location and travel to it when ready.
Once you reach the location, follow the Objective Marker to find the 42 meters to your northeast.
Get the Artifact
Enemies: Turret MK I (Level 6), Shaw Gang (Level 2, 6, 10), Shaw Gang Robot Level 10)
Image Credit: Bethesda via Meta Game Guides
This mission is quite simple, with most of the enemies being level 2. You shouldn’t face much resistance from enemies, whether in The Empty Nest‘s interior or exterior (something feels wrong here).
Your main focus at The Empty Nest should be to take out any Turrets and Robots. You can also loot some Credsticks and a Storage Box inside the first hut as you find as you approach, along with a text log.
You can loot 2 Digipicks, a Storage Box, 2 Ammo Cases, some ammo and resources, and another text log from the igloo-like huts, while the first one of them has a Weapon Workbench.
Once you are done with the exterior, it’s time to head inside The Empty Nest.
The Empty Nest entrance Image Credit: Bethesda via Meta Game Guides
Once you enter, exterminate the two Shaw Gang members and loot the Ammo Case, the Weapon Case, and the Credstick you find. You will also find a Contraband Cache (Expert Security Level) and the Shaw Gang Cave Key on a table behind it.
Loot the Shaw Gang Cave Key from the table Image Credit: Bethesda via Meta Game Guides
You will reach a locked door (Advanced Security Level), which you can unlock with the Shaw Gang Cave Key. From there, there is not much more resistance.
Use your Cutter to mine the mineral deposits as you follow the Objective Marker, and soon you will reach Artifact Chi.
Artifact Chi is just a few steps away now Image Credit: Bethesda via Meta Game Guides
Leave the Hideout
Return to the cave’s entrance to leave the location.
Deal with Shaw
Image Credit: Bethesda via Meta Game Guides
So, things were looking too easy so far. The leader of the Shaw Gang will show up at the cave’s entrance. After a dialogue, you will have the following options:
Persuade
Pay 4000 Credits
Attack
I took the persuasion route here, which also helped me in the upcoming fight.
(Optional) Kill the Ashta
After your conversation ends (or after your fight against Shaw ends), you will be attacked by 2 Ashta (Level 10). If you persuade Shaw, you will have some help in the fight.
(Optional) Talk to Shaw
If you didn’t fight Shaw, you can talk to her to get the Modified Razorback after the fight with the Ashta. It’s time to get back home.
Return to The Lodge
Once back at The Lodge, enter the Library.
Add the Artifact
Image Credit: Bethesda via Meta Game Guides
Add the Artifact to the collection.
Wait for Sam
Image Credit: Bethesda via Meta Game Guides
Wait for Sam and Cora to join the conversation and talk to him so that he (and Cora) join your crew. You have completed The Empty Nest!
Anastasios Antoniadis is the founder and editor-in-chief of Meta Game Guides. He has been covering and writing about video games and technology for over 4 years. He is a 2014 graduate of the Department of Informatics and Telecommunications of the University of Athens. In his off-time, he enjoys playing video games, watching films and TV shows, reading, and enjoying the outdoors. Currently he is invested in Starfield, Persona 3 Reload, Helldivers 2, Palworld, and Baldur's Gate 3.