
The universe in Starfield is as expansive as it is beautiful. And let’s face it: With galaxies and star systems to explore, it can be easy to get lost in the journey and forget about your destination. Fortunately, the game offers a robust set of fast travel options to get you where you need to be. From Hand Scanners to Grav Jumps, we’ll unpack every facet of the game’s fast-travel mechanics in this in-depth guide.
How to Fast Travel in Starfield
Navigating the expansive universe in Starfield can be time-consuming. That’s where the fast travel feature comes in handy. But the game offers multiple avenues for fast travel, and understanding each one can optimize your gameplay. Let’s take a comprehensive look.
1. Hand Scanner Method
Here’s how to fast travel using the Hand Scanner:
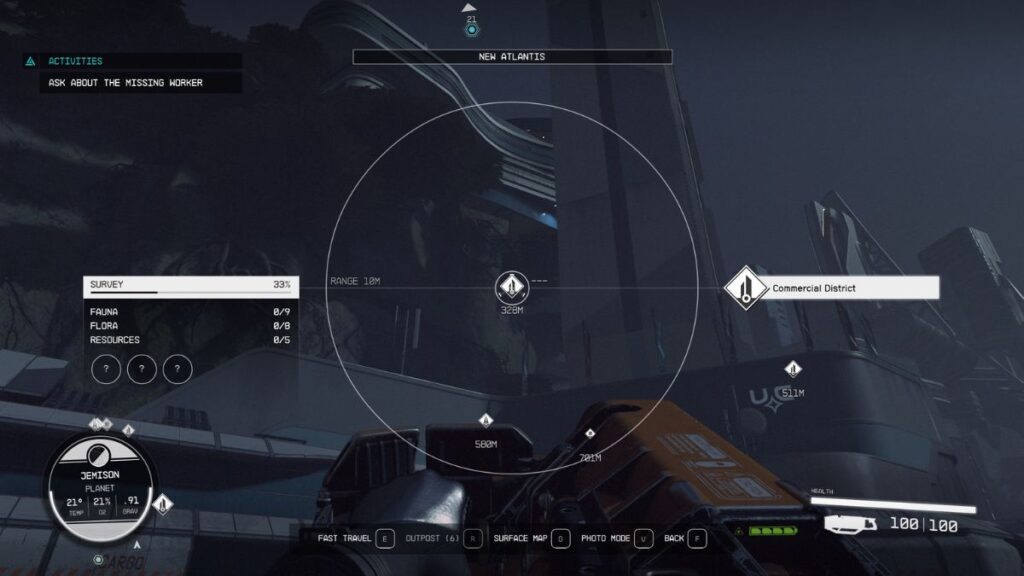
- Initiate the Hand Scanner: Tap the “F” key on PC or the “LB” button on a controller.
- Hover Over the Location: Use your mouse or controller to hover over your chosen location on the Hand Scanner interface.
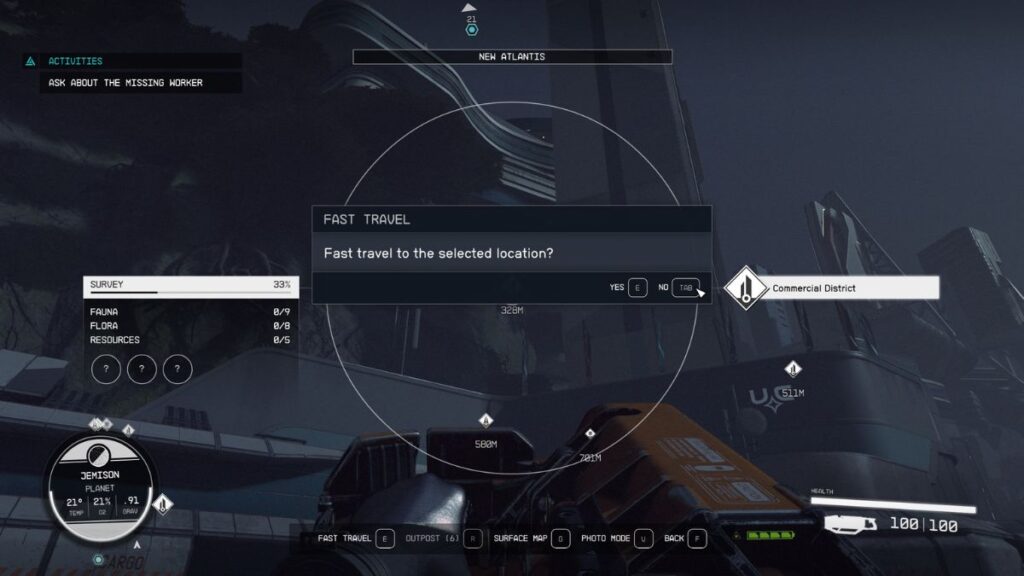
- Select and Confirm: Press the “E” key on PC or the “A” button on a controller to confirm your fast travel choice.
In the example below, I open my Hand Scanner and fast travel to New Atlantis’ Commercial District from the spaceport.
Note: The Hand Scanner method works both on foot and when flying your spaceship. It’s a versatile and quick way to move between locations (and my favorite one to move to objectives inside cities fast).
Advanced Tip: Switching Targets in Space
- To cycle between destination points while flying your ship, point the Hand Scanner at an empty patch of space and keep pressing the action button (“E” or “A”).
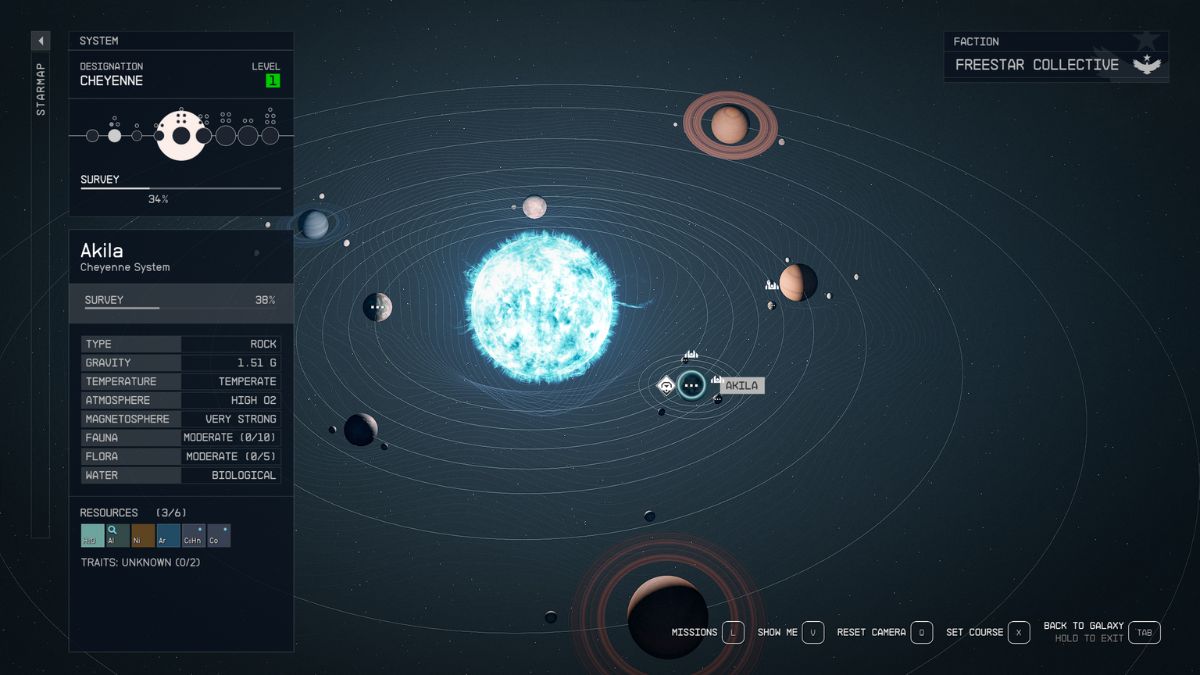
2. Fast Travel Using the Star Map
Jumping to Other Systems (Explored & Unexplored)
- Open your Starmap by pressing ‘M’ on PC or the ‘View’ button on Xbox.
- Navigate to a Star System.
- Press the action button to select it (if there is more than one system in the same spot, press the action button to open a dropdown menu, then choose the system you want to fast travel to).
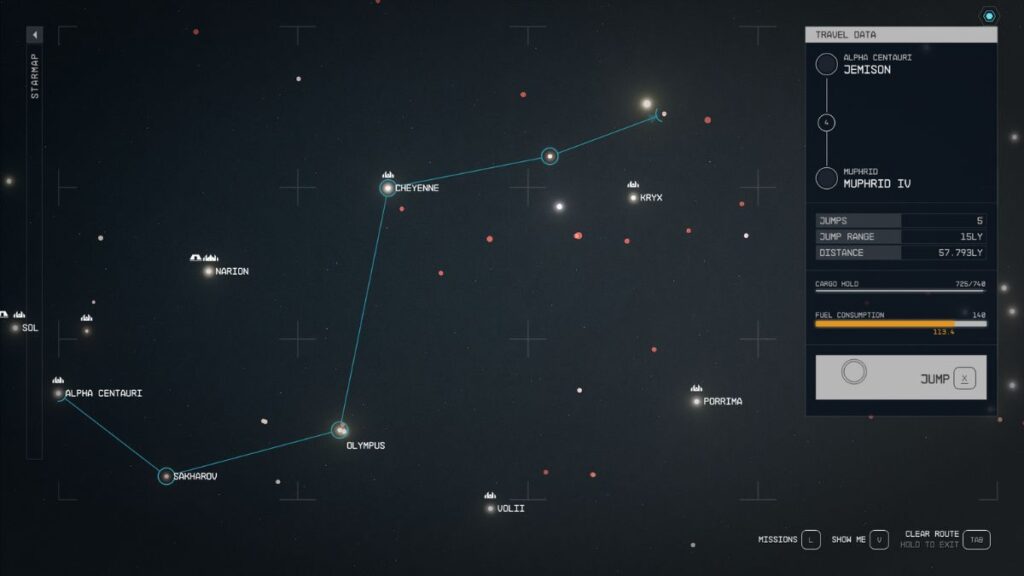
- Hold down the “X’ button on the keyboard on PC to Grav. Jump to the system you selected.
To fast travel across Settled Systems, ensure you’ve already explored the star systems along your path.
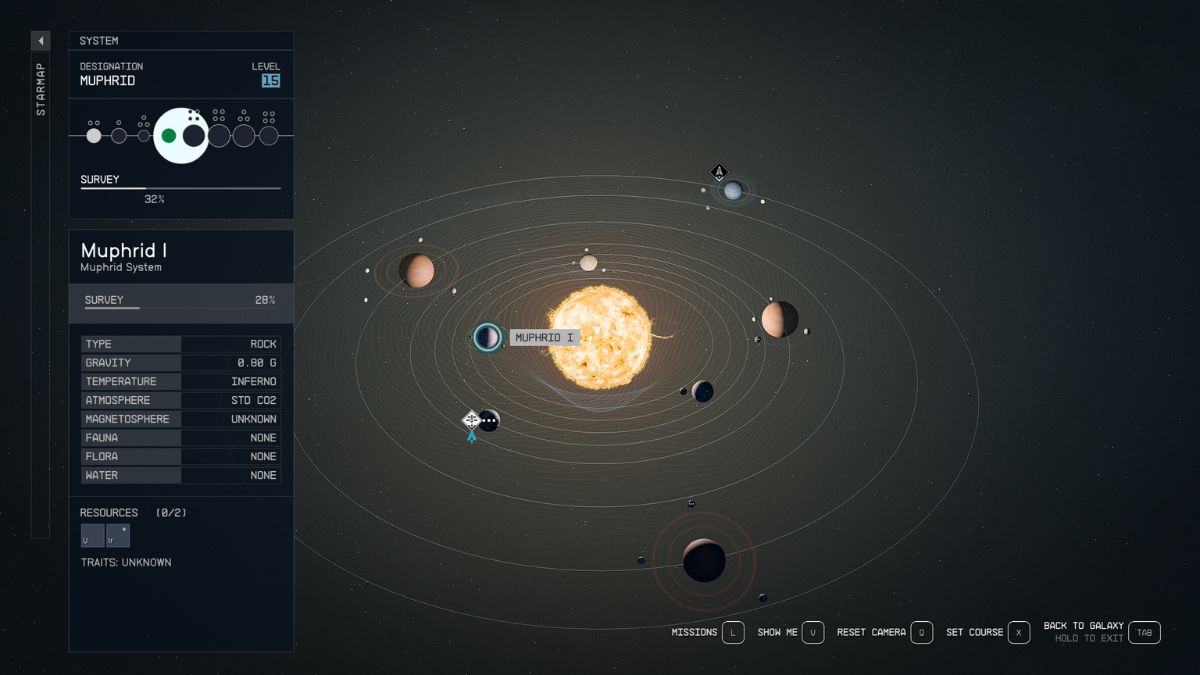
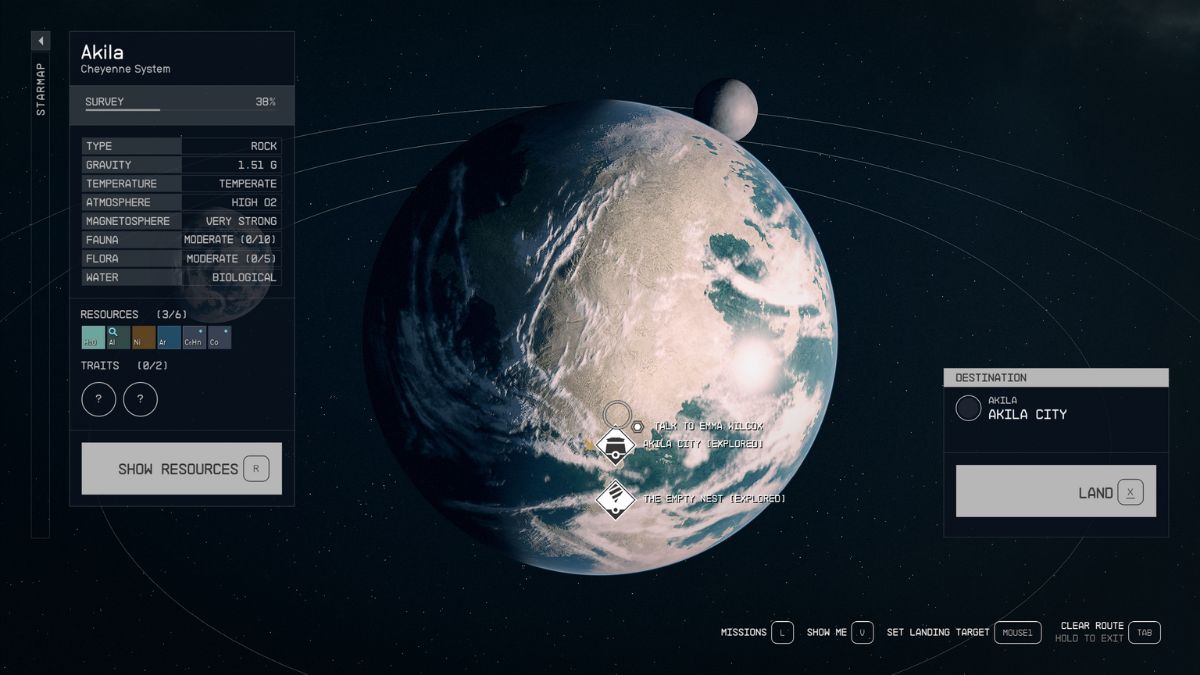
Setting Course to Planets’ Orbits (Explored and Unexplored)
Once you have explored a system, you can pick any planet on it (explored or explored) from the Star Map and “Set Course” to it:
- Open your Starmap by pressing ‘M’ on PC or the ‘View’ button on Xbox.
- Navigate to a Star System.
- Press the action button to select it (if there is more than one system in the same spot, press the action button to open a dropdown menu, then select the system you want to fast travel to).
- Target the planet you want to fast travel to (don’t press the action button, “E” or “A”).

- Press the “X’ button on a keyboard on PC to “Set Course” to the planet.
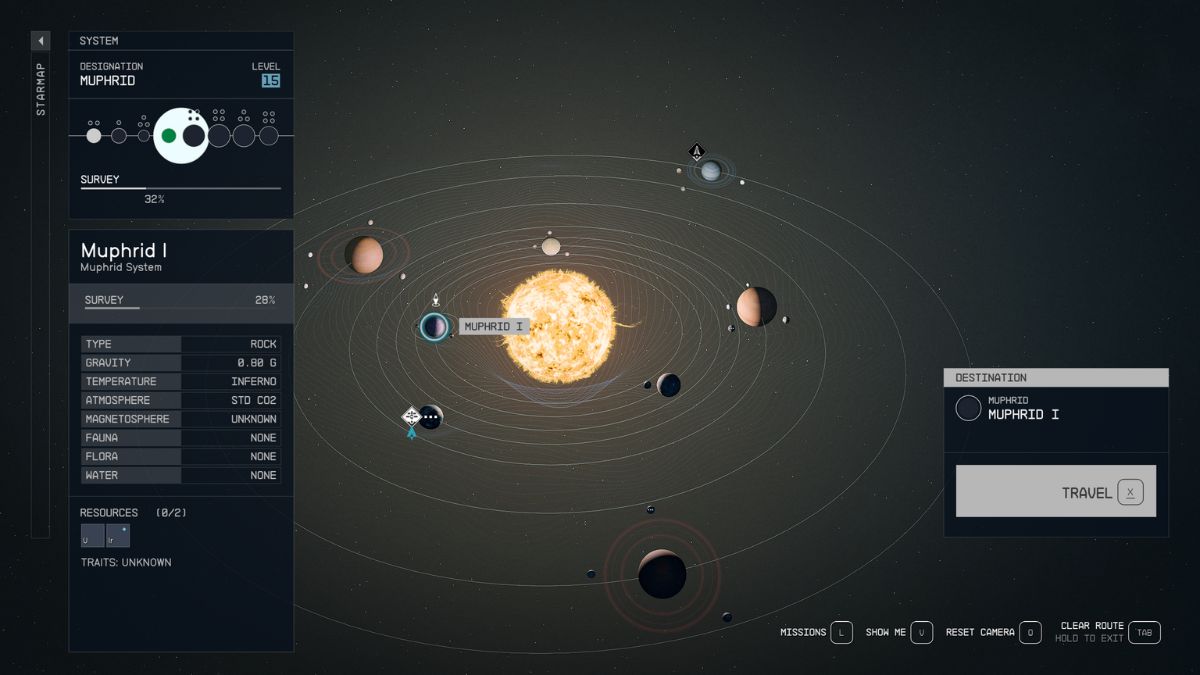
- Alternatively, you can select the planet with the action button or click and then select it again with the action button or click to “Set Course” to it.
- Press “E” on PC or “A” on Xbox to confirm your selection.
- Hold down “X” on PC to fast travel to the planet’s orbit.
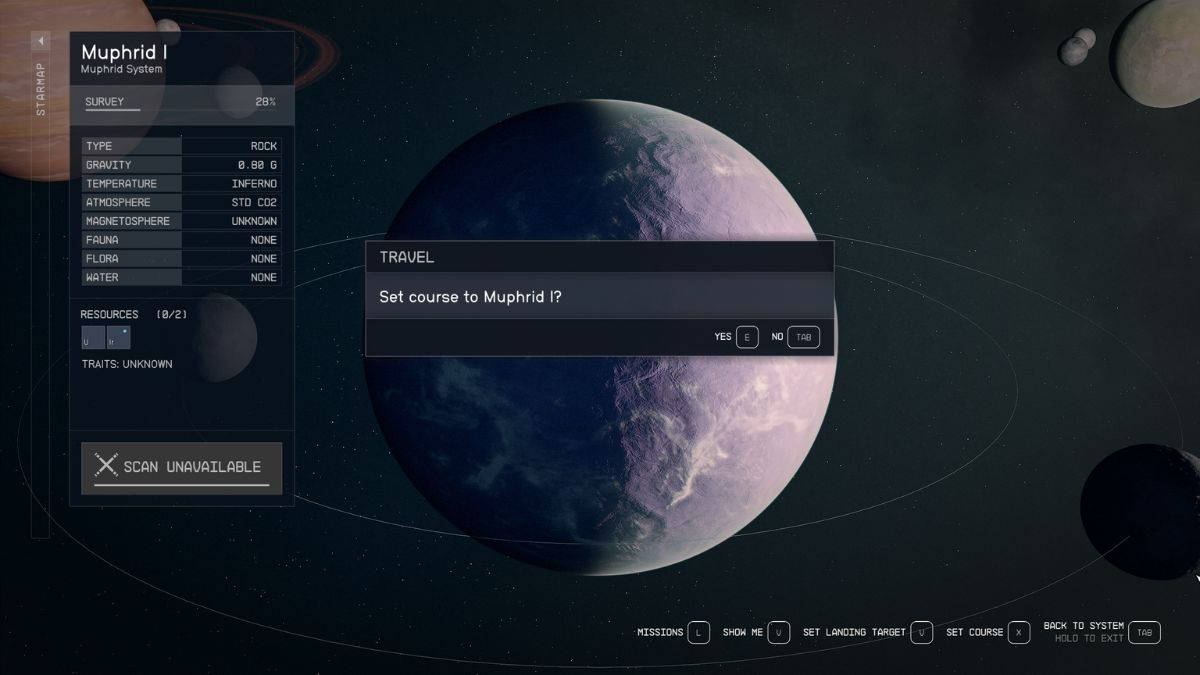
Landing on Planets (Explored Only)
If you have already explored a planet you can jump straight into landing to it.
- Open your Starmap by pressing ‘M’ on PC or the ‘View’ button on Xbox.
- Navigate to a Star System.
- Press the action button to select it (if there is more than one system in the same spot, press the action button to open a dropdown menu, then select the system you want to fast travel to).
- Click on the planet you want to land on (once again, you must have explored it).
- Once you open the planetary view, click anywhere on the planet to set a landing spot.
- Then, hold down “X” to land on the selected landing spot.
3. Fast Travel Using the Missions Menu
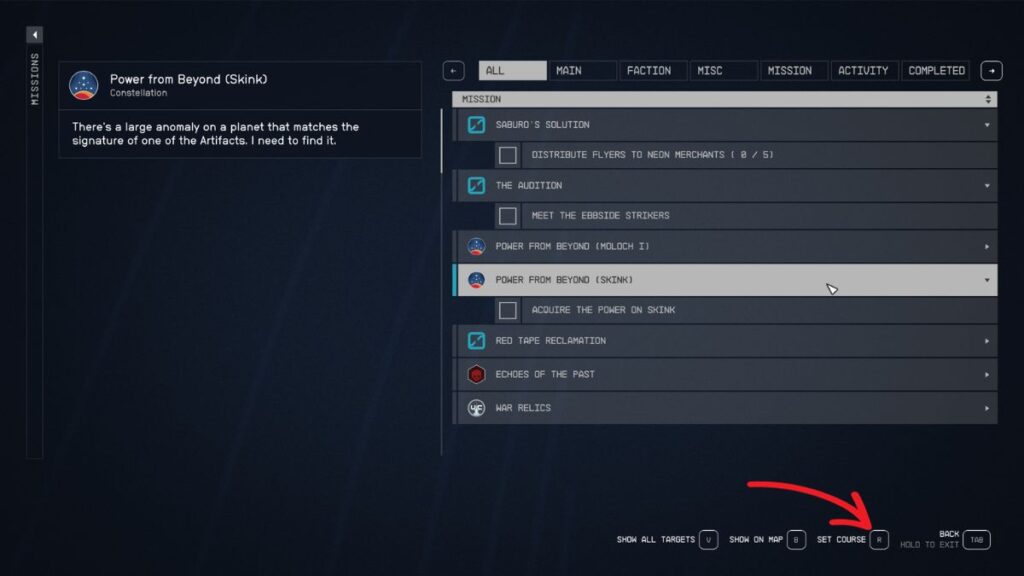
Here is how to fast travel to objectives using the mission log.
- Open the Missions Menu/Log by pressing “L” on PC or opening the menu on Xbox.
- Make sure the mission you want to complete is being tracked or select it to track it.
- Tap the “R” key on PC or “X” button on a controller to set your course to the objective.
- Confirm fast travel once the map by holding down “X” on PC shows your exact mission location.
Advanced Tips
- Using the Missions Menu is incredibly efficient when focusing on mission-based gameplay, as it auto-directs you to your objectives.
By mastering these fast travel methods, you can minimize downtime and maximize the action, ensuring a more efficient and enjoyable Starfield experience.
How to Increase Your Grav Jump Distance
Your Grav Jump distance is primarily limited by your ship’s Grav Drive capabilities and the fuel you have onboard. Here’s how to extend your Grav Jump distance by upgrading existing systems or buying a new spaceship.
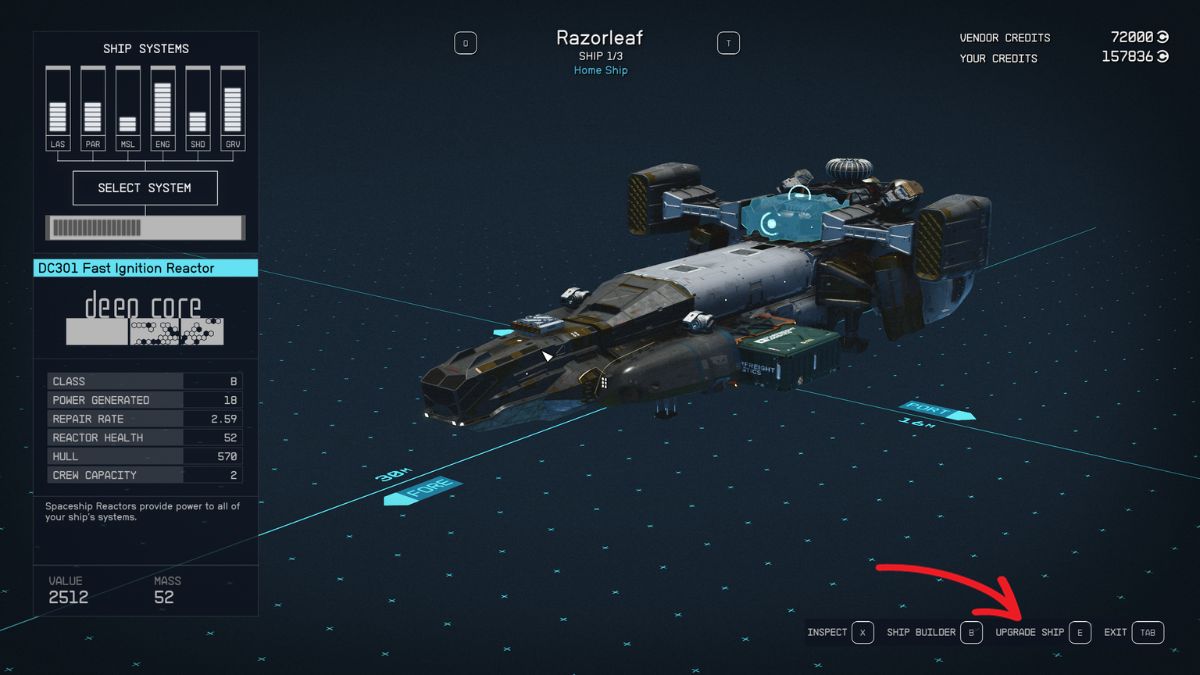
How to Upgrade Your Existing Grav Drive
Here are the steps to upgrade your existing Grav Drive:
- Locate a Ship Service Technician: Ship Services Technicians are usually found near landing pads in major settlements like New Atlantis or Neon. You can also find salesmen in staryards and showrooms.
- Modify your ship: Select “I’d like to view and modify my ship” from the dialogue.
- Access the Upgrade Menu: Select the “Upgrade Ship” option once the vendor menu opens.
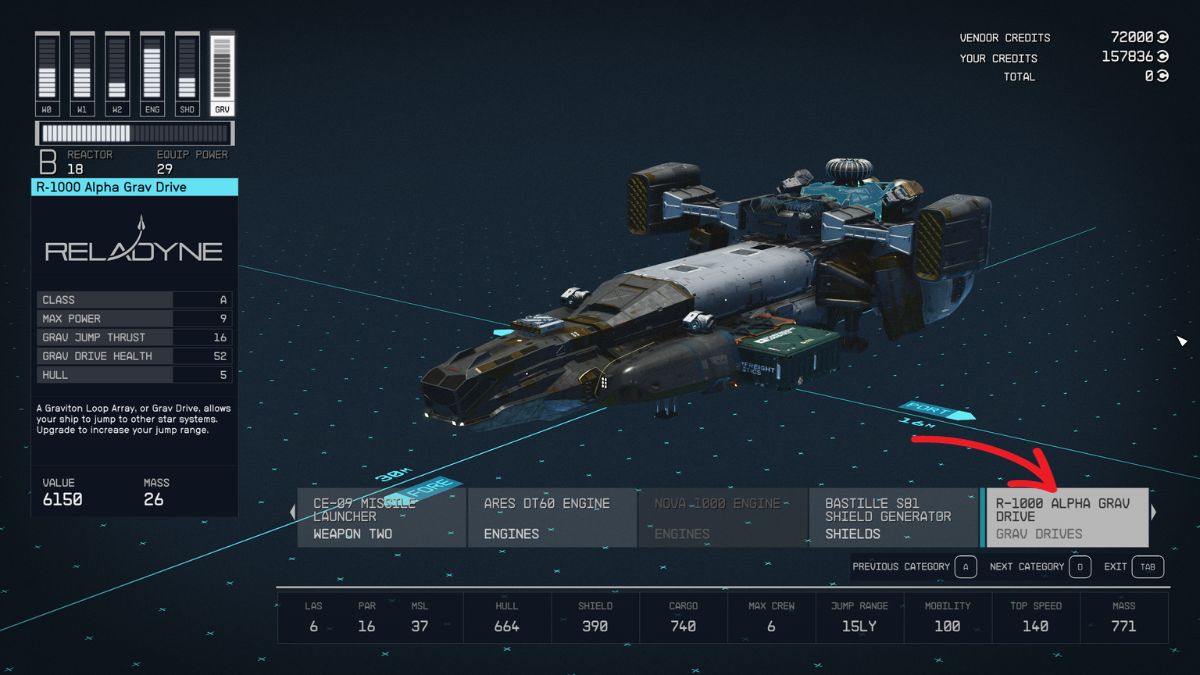
- Choose the Grav Drive: Navigate through the list of ship components until you find the Grav Drive.
- Select Your Upgrade: Choose a higher-tier Grav Drive with increased Grav. Jump Thrust.
- Purchase and Install: Complete the transaction, and the new Grav Drive will be installed in your ship, increasing your Grav Jump distance.
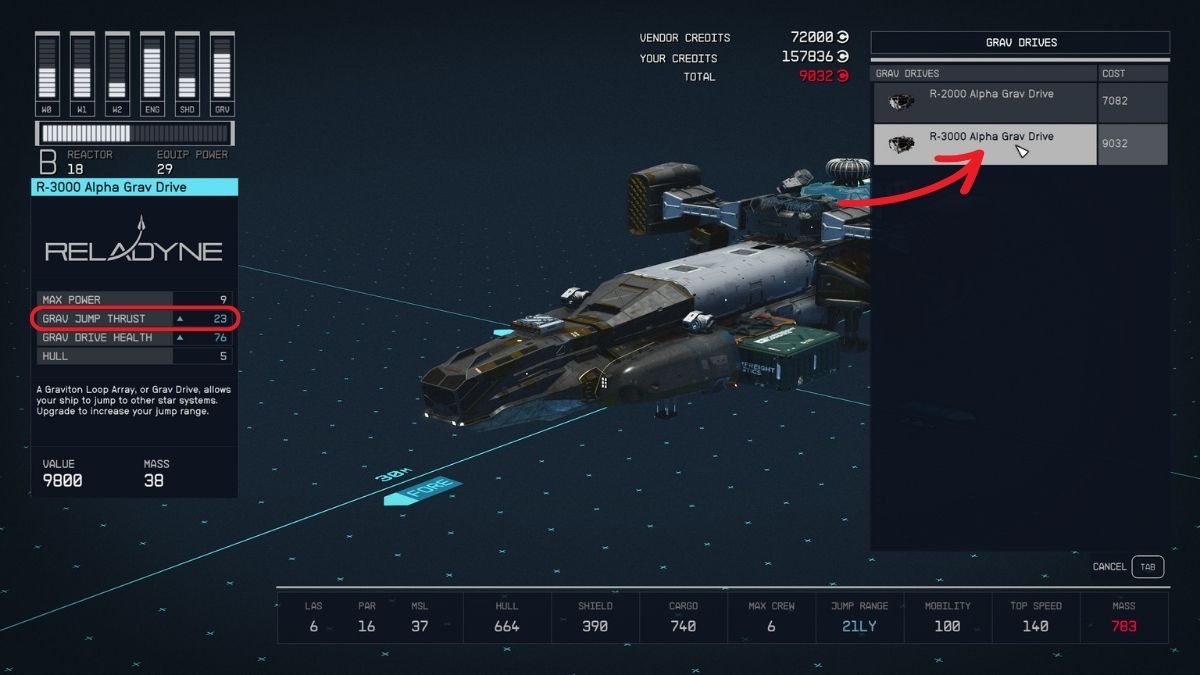
Pay attention to the Piloting Skill and Starship Design requirements when choosing a new Grav. Drive.
How to Buy a New Ship with a Better Grav Drive
Here are the steps to buy a new ship with a better Grav Drive:
- Visit Ship Technicians: These can usually be found in large settlements and sometimes in space stations.
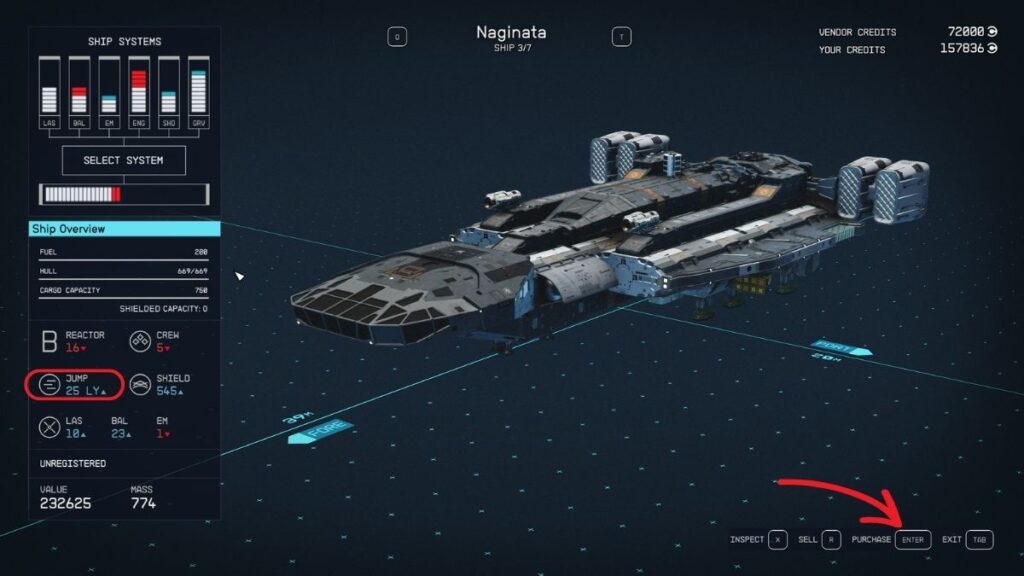
- Check the Ships for Sale: Pick the “Let me see what ships you have for sale.” dialogue option.
- Review Ship Specs: Browse available ships, paying close attention to the Grav Jump distance.
- Make Your Purchase: Buy the ship with the Grav Jump distance that suits your needs.
- Transfer Components and Cargo: Dont forget to transfer any upgrades and cargo from your old ship to the new one.
Tips:
- Make sure to sell your old ship if you don’t need it anymore to get some credits back.
- Newer ships with better Grav Drives usually come with additional benefits, like enhanced shields or better cargo space, so consider these as well when making your choice.
3. Buying a Bigger Fuel Tank for Longer Jumps
You don’t have to refuel your ship in Starfield, but your Fuel Tank Capacity limits the amount of consecutive jumps you can perform. Buying a bigger fuel tank will let you explore faster as you will be able to make more consecutive jumps, thus fewer fast travels, when fast traveling from one side of the universe to the other.
Why Can’t I Fast Travel in Starfield?
Navigating the Starfield universe, you may encounter moments where fast travel isn’t available. If you’ve found yourself stumped by a “Cannot Fast Travel” message, here are the most common culprits, with details on how to resolve each issue.
1. You’re Encumbered
- Symptoms: A pop-up message informs you that your weight limit is over.
- Solution: Drop, sell, or transfer items from your inventory until you reach your weight threshold.
2. In Combat
- Symptoms: Nearby hostiles or a combat situation will prevent fast travel.
- Solution: Either defeat or escape all nearby enemies. Once clear, the fast travel option will be enabled again.
3. Environmental Damage
- Symptoms: Fast travel is locked if you’re taking damage from environmental hazards.
- Solution: Move away from the hazardous area or use protective gear to mitigate environmental damage.
4. Distance Constraints
- Symptoms: The location is too far, exceeding your Grav Jump distance.
- Solution: Refuel or upgrade your Grav Jump drive. Alternatively, travel to a closer location and then continue to your ultimate destination.
5. Ship Docked
- Symptoms: Fast travel is not available if you’re docked at a station or another ship.
- Solution: Undock your ship, and then initiate fast travel.
6. Unexplored Route
- Symptoms: The route to your destination goes through unexplored star systems.
- Solution: You must make the trip in increments, exploring each uncharted system.
7. Low Fuel
- Symptoms: Your ship doesn’t have enough fuel for the complete journey.
- Solution: Refuel your ship by adding more HE3 tanks in the Ship Builder or take the trip in shorter bursts.
8. Mission Constraints
- Symptoms: Your current mission prohibits fast travel.
- Solution: Complete the mission or progress to a stage where fast travel is enabled again.
9. Location Constraints
- Symptoms: Some interior locations, like houses or caves, may not permit fast travel.
- Solution: Exit the interior location and use the map or Missions Menu for fast travel.
10. Mid-Air Actions
- Symptoms: Fast travel is not an option if you’re in the middle of a jump or falling.
- Solution: Land safely on the ground before attempting to fast travel.
11. Game-Specific Restrictions
- Symptoms: Sometimes, specific missions or locations have unique fast travel restrictions.
- Solution: Comply with the mission-specific instructions or conditions. Usually, these will be outlined in the mission brief or your log.
12. Bugs or Glitches
- Symptoms: If you’ve checked all of the above and still can’t fast travel, you might encounter a bug.
- Solution: Restart the game or load an earlier save. If the problem persists, report the issue to Bethesda.
Knowing why you can’t fast travel at certain moments and understanding how to resolve these issues will save you time and frustration, enhancing your Starfield gameplay experience.
Originally posted 2023-10-05 00:10:55.

- Sextant Shield Systems 20T Hauler Cargo Hold: Starfield - April 24, 2024
- Sextant Shield Systems 30T Hauler Cargo Hold: Starfield - April 24, 2024
- Sextant Shield Systems 400CM Ballast Cargo Hold: Starfield - April 24, 2024